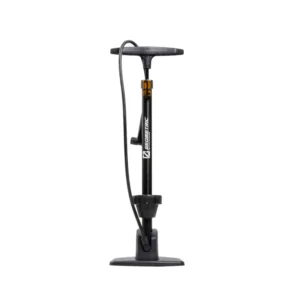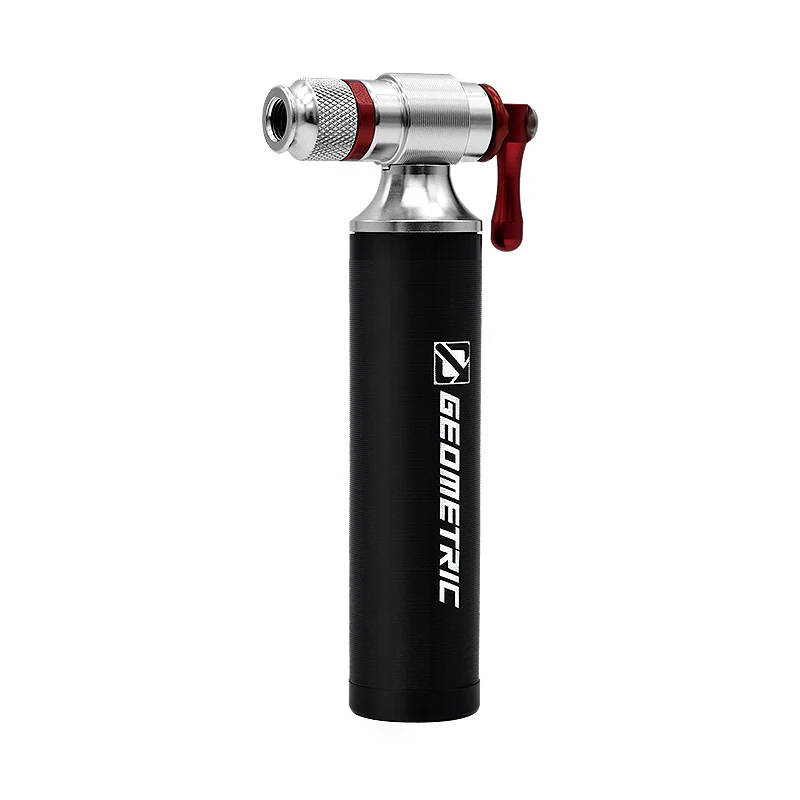
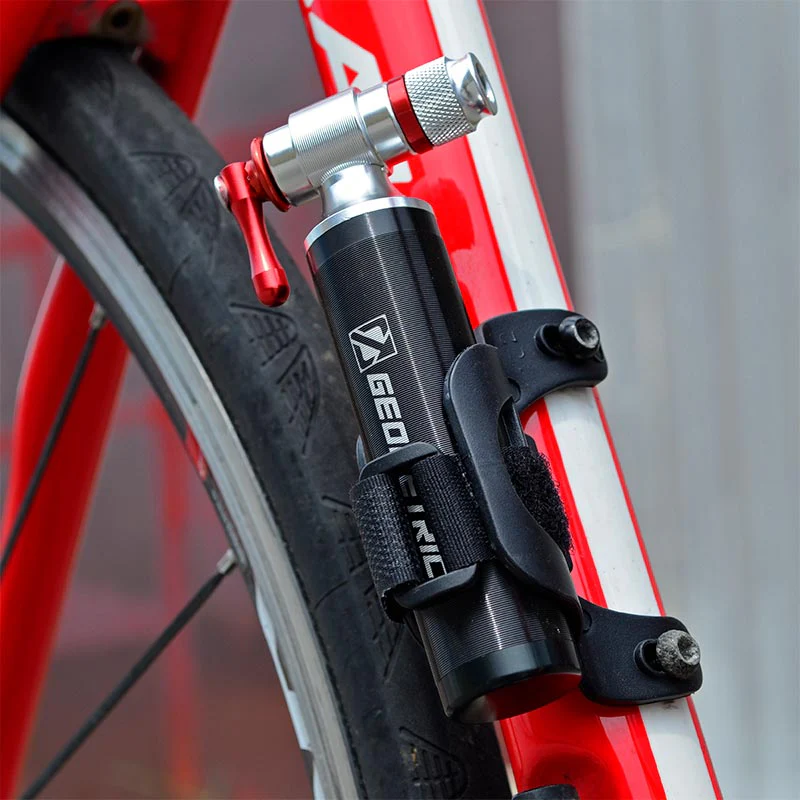
When a flat strikes mid-ride, the Geometric CO₂ Portable Mini Bike Pump is your lightweight, efficient backup solution. Designed for one-hand operation with a patented push-button, this CO₂ inflator doubles as a backup to your standard pump. Built from CNC aluminium alloy, it is durable yet compact—perfect for mounting on your frame or stowing in a saddle bag. The unit is compatible with both Presta and Schrader valves without head swapping, making it extremely versatile for everyday cyclists in Malaysia.
Specifications & Dimensions
-
Body Material: CNC-machined aluminium alloy with durable precision parts
-
Valve Compatibility: Built to fit both Presta (French) and Schrader (standard MTB / car) valves — no head switching needed
-
Operation Mechanism: Patented push-button for quick one-hand inflation
-
Weight: 0.1 kg
-
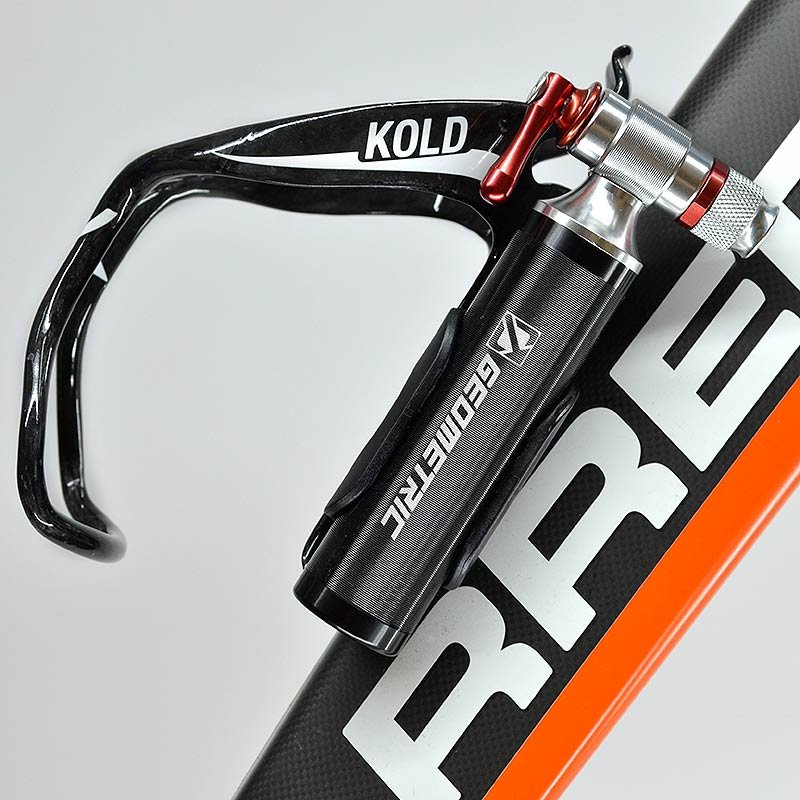
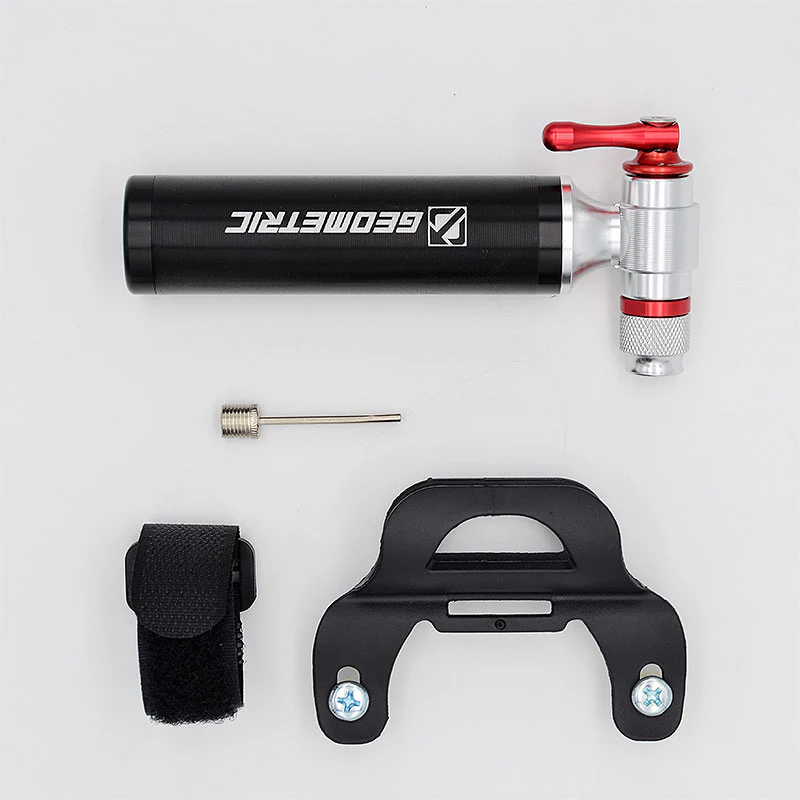
Mounting / Storage: Supplied with a bracket and Velcro strap so it can be secured to your bike frame or stored in a bag
-
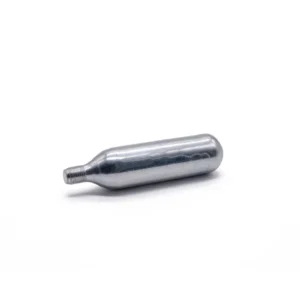
Gas Cartridge: Not included — this unit is the inflator head only. You must purchase compatible CO₂ cartridges separately.
Key Features & Benefits
-
Fast, one-hand inflation with the push-button design — ideal when you need to fix a flat quickly.
-
Dual-valve compatibility means no fumbling with adapters or head changes in the field.
-
Lightweight and compact — at ~100 g, it adds minimal weight to your kit.
-
Strong construction from CNC aluminium ensures durability under riding conditions.
-
Flexible mounting options—frame bracket or Velcro strap helps keep it secure and accessible.
-
Great as a CO₂ inflator backup to your regular mini-pump (so you carry both for reliability).
Usage Instructions
-
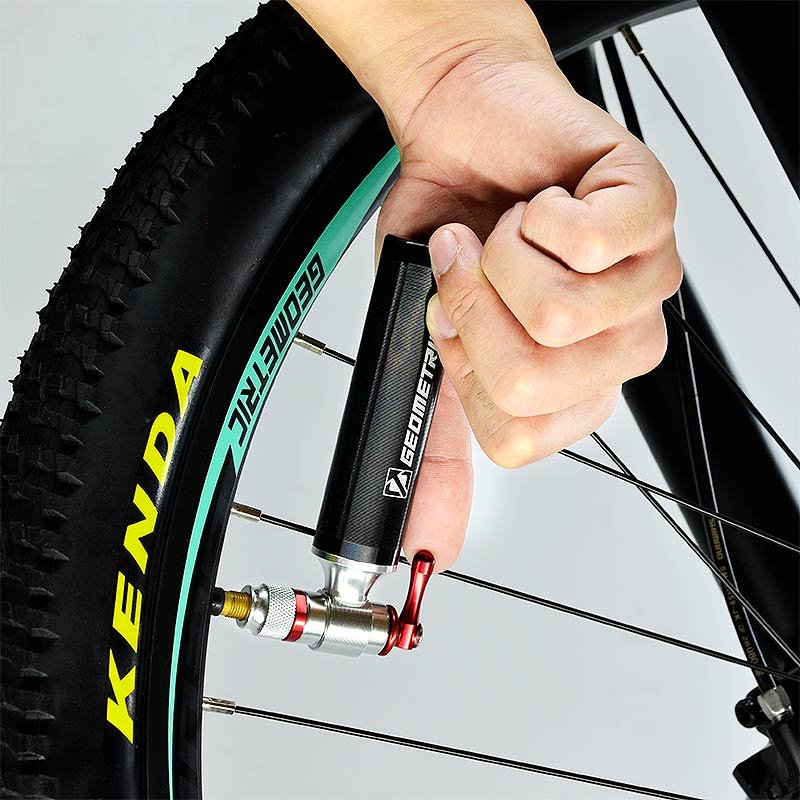
Prepare the tyre valve
-
Ensure the valve (Presta or Schrader) is clean, open (for Presta, unscrew the top) and ready for gas.
-
Inspect the valve to ensure no debris or damage.
-
-
Attach the pump head
-
Align and push the inflator head onto the valve.
-
If there is a locking lever or mechanism (depending on design), engage it to secure the head.
-
-
Inflate
-
Press the push-button to release CO₂ gas into the tyre.
-
Apply in short bursts, monitoring tyre pressure to avoid over-inflation.
-
Once desired pressure is reached (based on tyre sidewall rating), release the button.
-
-
Detach & finish
-
Disengage the locking mechanism (if any), and pull the pump head off carefully (avoid damaging the valve).
-
Immediately cap or close the tyre valve (if applicable).
-
Replace the CO₂ cartridge if it’s a one-shot unit.
-
-
Post-ride or long ride consideration
-
CO₂ gas may seep out slowly through tube walls over time—top up with a manual pump when possible.
-
Check for any leaks or seal faults before next use.
-
Precautions & Safety Notes
-
This device requires CO₂ cartridges to function; do not expect it to inflate tyres by itself.
-
Never point towards face, hands, or body when pressing the button — rapid gas release can be extremely cold and injure skin.
-
Do not over-inflate tyres—observe maximum pressure stated on tyre sidewall (in psi or bar).
-
Use compatible CO₂ cartridges only. Avoid attempting to force incompatible threading.
-
After each use, check for damage or wear—cracks in the body or valve head defects should be cause for replacement.
-
Avoid exposure to extreme heat, direct sunlight, or corrosive environments—these can weaken the aluminium body or seals.
-
This is a single or limited use device per cartridge; once the CO₂ cartridge is spent, replace and inspect before next ride.
-
Keep the pump head and mechanism clean and dry—moisture or grit can impede sealing or operation.